Sign
Information Page
Discover everything about our signs and how to install yours. Please read on to see what's included with your sign, a step-by-step installation guide, and instructions on how to use the dimmer remote.
What’s included
with your order:
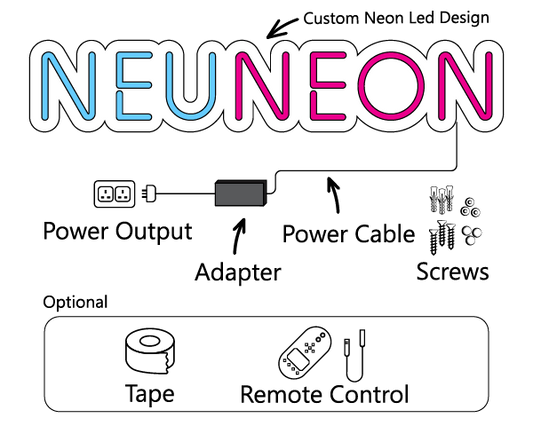
· Your Ready to go LED Neon Sign
· Wall Fixtures, Screws and Rawl Plugs
· Mains Power Supply
Optional Extras:
· Dimmer Remote & Receiver
· Battery Pack
· Ceiling Hanging Kit


1. Mark out & Drill Holes
Take your sign and place it flat up against the wall (it will be easier to have a friend help you out with this part). Use a pen to mark the wall where the predrilled holes are on your signs acrylic backing.
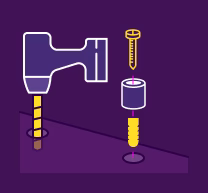
2. Drill 'n' Screw
Drill pilot holes exactly on the points you marked out in Step 1 and insert the rawl plugs. Unscrew the top of the studs from the bottom. Put the screw through the bottom half of the stud and screw into the rawl plug with a screwdriver. Repeat this for all holes.

3. Attach the Bolts
Hold you sign up so that the predrilled holes are matched up with the bottom part of the wall studs. Screw the top half of the wall studs through the predrilled holes into the bottom half.

4. Repeat and Tighten
Your sign should now be sandwiched between the top and the bottom half of the studs. Repeat this for all of the remaining studs. Try not to over tighten them as this can damage the acrylic backing.
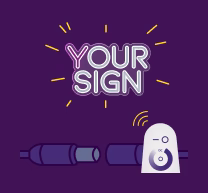
5. Plug it in!
You can now plug the dimmer remote receiver into the clear power cable on one end, and the black mains power cable into the other. Once this is done, simply plug in the mains power supply (or battery pack) and you are good to go!


Sorry! Products are not enough.
Recipient email can't be blank.
Send on must be within 90 days from now